Creating a ReadtheDocs Documentation
Background
This tutorial describes a step-by-step tutorial to create a ReadtheDocs webpage and PDF file of an already created GitHub repository, using sphinx, LaTex, conda, and git.
This is run using Ubuntu 18.04 Bionic Beaver. For different Ubuntu distributions, download and install the appropriate software/packages.
Code ran on Linux terminal is preceded by $.
Note
This is not an official IAEA publication but is made available as working material. The material has not undergone an official review by the IAEA. The views expressed do not necessarily reflect those of the International Atomic Energy Agency or its Member States and remain the responsibility of the contributors. The use of particular designations of countries or territories does not imply any judgement by the publisher, the IAEA, as to the legal status of such countries or territories, of their authorities and institutions or of the delimitation of their boundaries. The mention of names of specific companies or products (whether or not indicated as registered) does not imply any intention to infringe proprietary rights, nor should it be construed as an endorsement or recommendation on the part of the IAEA.
Installing conda and Setting Up bioconda Channels
It is recommended to install miniconda3 and mamba for creating virtual environments and installing all necessary packages and dependencies without affecting the system. Miniconda is a free minimal installer for conda. It is a small, bootstrap version of Anaconda that includes only conda, Python, the packages they depend on, and a small number of other useful packages, including pip, zlib and a few others. Use the conda install command to install 720+ additional conda packages from the Anaconda repository.
Verify your system.
$ uname -m
Miniconda3 (conda) and Mamba
Download the Miniconda3, or simply “conda”, installer:
Run the downloaded installer (for a 64-bit system):
$ bash Miniconda3-latest-Linux-x86_64.sh
Open a new terminal window for conda to take effect. The word (base) should appear in front of the computer name in the terminal window.
Verify the installation and update conda in new terminal window with:
$ conda env list
$ conda update --all
$ conda upgrade --all
Install mamba library/package manager that will be used for installing software dependencies of the tool:
$ conda install mamba --yes
Setup the appropriate channels for searching software packages. Make sure to run the following commands exactly in this order,
$ conda config --add channels defaults
$ conda config --add channels bioconda
$ conda config --add channels conda-forge
The bioconda channel is now enabled, so you can install any packages and versions available on the bioconda channel.
It may be possible that Python 2.7 was installed with miniconda3. In order to use a newer version of Python, install the preferred Python version and update conda to resolve any dependency failures,
$ mamba install python=3.7
Creating a conda environment
Create a new conda environment with:
$ conda create --name <environment-name>
Substitute <environment-name> with the preferred name you want. As an example,
$ conda create --name sphinx-tutorial
Once the newly created environment has been installed, activate it to make the neccesary installations. Activate the conda environment with,
$ conda activate sphinx-tutorial
If more than one conda environment exists, the previously created conda environments can be listed in the terminal by running,
$ conda env list
Installing sphinx, LaTex, and git
Install git, sphinx and LaTex using by conda with,
$ mamba install git
$ mamba install sphinx
$ mamba install sphinx_rtd_theme
Cloning the GitHub Repository to Local Machine
The sphinx and LaTex documentation will be created in the local machine. For this, whichever GitHub repository of interest needs to be cloned to the local machine, edited locally, and then pushed back to GitHub. In order to clone the repository, navigate to the corresponding webpage in GitHub, click on Code, and copy the HTTPS link by highlighting the provided link or clicking the Clipboard sign, as shown bellow.
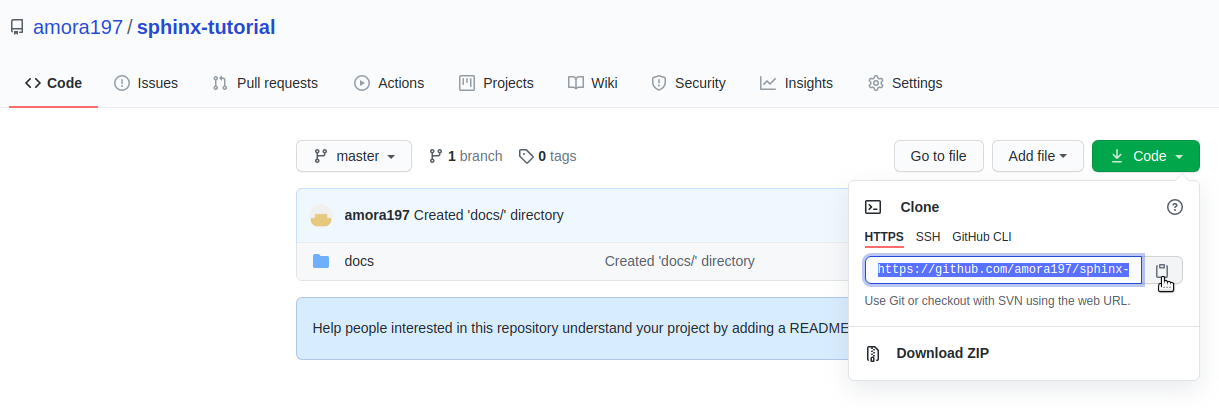
Link used to clone locally the repository. (click to expand)
Clone the repo in the Linux terminal into a location of choice. It is recommended to have a specific directory with GitHub repositories for being organized. Substitute <user-name> and <repo-name> with the correct user and repository names, accordingly, using,
$ git clone https://github.com/<user-name>/<repo-name>.git
Navigate to your cloned repository in the local machine,
$ cd /path/to/GitHub/cloned-repo
Running sphinx-quickstart
A docs/ directory is needed to contain all the files sphinx will create. Create a docs/ directory with,
$ mkdir docs
$ cd docs/
Run sphinx to start building the documentation,
$ sphinx-quickstart
Prompts will pop up, asking about the project information. Fill them out accordingly. Here is an example,
> Project name: sphinx-tutorial
> Author name(s): Anibal Morales
> Project release []: 1.0
> Project language [en]:  **(press Enter/Return; default to English '[en]')**
Once the project information has been collected, the following output should be seen
Creating file /home/anibal/miniconda3/envs/rtd-tutorial/doctut/docs/source/conf.py.
Creating file /home/anibal/miniconda3/envs/rtd-tutorialsphinx-quickstart/doctut/docs/source/index.rst.
Creating file /home/anibal/miniconda3/envs/rtd-tutorial/doctut/docs/Makefile.
Creating file /home/anibal/miniconda3/envs/rtd-tutorial/doctut/docs/make.bat.

Finished: An initial directory structure has been created.

You should now populate your master file /home/username/miniconda3/envs/CondaEnv/repo-name/docs/source/index.rst and create other documentation source files. Use the Makefile to build the docs, like so:
**make builder**
where "builder" is one of the supported builders, e.g. html, latex or linkcheck.
Inside the docs/ directory, there should be the build/ and source/ directories, along the make.bat and Makefile files,
$ ls
build  make.bat  Makefile  source
It is recommended to create inside the docs/``directory an ``images/ directoy to store all the image files that need to be included in the documentation.
$ mkdir images
$ ls
build  images  make.bat  Makefile  source
Editing the index.rst File
Sphinx uses reStructuredText (or reST) as the default plaintext markup language. The index.rst file will contain all of the project documentation in reST format. Sphinx provides a reST Primer to help making the documentation. In order to begin typing the documentation, navigate to the source/ directory and edit the index.rst file as needed with whichever text editor of choice,
$ cd source
$ gedit index.rst
Any images used in the index.rst file should be stored in the images/ directory created previously.
Editing the conf.py File
The conf.py file contains the metadata about the project. It also contains the themes, styles, and guidelines that sphinx needs to make the HTML and PDF files. In order to edit the conf.py file, navigate to the source/ directory, which also contains the index.rst file. After the #--Project information-- section, add the following to the file,
# -- General configuration ---------------------------------------------------

# install the needed theme with:
import sphinx_rtd_theme

# Add any Sphinx extension module names here, as strings. They can be
# extensions coming with Sphinx (named 'sphinx.ext.*') or your custom
# ones.
extensions = ['sphinx.ext.autodoc',
   'sphinx.ext.doctest',
   'sphinx.ext.intersphinx',
   'sphinx.ext.todo',
   'sphinx.ext.coverage',
   'sphinx.ext.mathjax',
   'sphinx.ext.ifconfig',
   'sphinx.ext.viewcode',
   'sphinx.ext.githubpages'
]

# Add any paths that contain templates here, relative to this directory.
templates_path = ['_templates']
source_suffix = '.rst'

# List of patterns, relative to source directory, that match files and
# directories to ignore when looking for source files.
# This pattern also affects html_static_path and html_extra_path.
exclude_patterns = ['_build', 'Thumbs.db', '.DS_Store']


# -- Options for HTML output -------------------------------------------------

# The theme to use for HTML and HTML Help pages.  See the documentation for
# a list of builtin themes.
pygments_style = 'sphinx'
master_doc = 'index'

html_theme = "sphinx_rtd_theme"
html_add_permalinks = ""

html_theme_options = {
    'sticky_navigation': True,
    'collapse_navigation': False,
}


# -- Options for LaTeX output ---------------------------------------------

latex_engine = 'pdflatex'
latex_theme = 'howto'
latex_toplevel_sectioning = 'section'


# Configuration of Title Page
latex_maketitle = r'''
        \pagenumbering{Roman} %%% to avoid page 1 conflict with actual page
        \begin{titlepage}
            \vspace*{10mm} %%% * is used to give space from top, Title
            \flushright\textbf{\Huge {Creating a ReadtheDocs Documentation v1.0}}
            \vspace{0mm} %%% Sub-Title
            \textbf{\Large {A Step-by-Step Guide}}
            \vspace{50mm} % Author name
            \textbf{\Large {Anibal E. Morales}}
            \vspace{10mm} % Organization Name
            \textbf{\Large {Plant Breeding and Genetics Laboratory}}
            \vspace{0mm} % Division/Department
            \textbf{\Large {FAO/IAEA Joint Division}}
            \vspace{0mm} % City, Country
            \textbf{\Large {Seibersdorf, Austria}}
            \vspace{10mm} % Creation Date
            \normalsize Created: October, 2020
            \vspace*{0mm} % Last updated Date
            \normalsize  Last updated: 4 December 2020
            %% \vfill adds at the bottom a note or caution
            \vfill
            \small\flushleft {{\textbf {Please note:}} \textit {This is an important note at the bottom of the title page.}}
        \end{titlepage}
        \pagenumbering{arabic}
        \newcommand{\sectionbreak}{\clearpage}
'''
latex_elements = {
   'releasename': 'Version 1.2',
   'maketitle': latex_maketitle,
}
Under the #--Options for LaTex output--, edit the \begin{titlepage} section. Comments with % are added, specifying the information that should be typed.
Making the HTML and PDF Files
Once the conf.py and index.rst files have been edited, it is time to make the HTML and PDF files. First, navigate to the docs/ directory where build, images, source, make.bat, and Makefile are.
$ cd ..
Create the index.html and sphinx-tutorial.pdf files with the following commands,
$ make html
$ make latexpdf
If no errors pop up, the files have been built. Otherwise, fix the errors according to the error messages and re-run the commands to make the files needed. The index.html file can be found inside the directory /docs/build/html/, while the sphinx-tutorial.pdf file will be found inside the directory /docs/build/latex/. Both files can be reviewed by opening them and checking the outputs created, using the xdg-open commands,
$ xdg-open build/html/index.html
$ xdg-open build/latex/sphinx-tutorial.pdf
Note
sphinx-tutorial.pdf will have the given name of the project been built. Here sphinx-tutorial represents an example name to specify where the file will be located after running make latexpdf.
Edit and make the index.html and sphinx-tutorial.pdf files as many times as needed until the wanted results are found.
Pushing the Project to GitHub
Once all the edits and the wanted documentation styles are done, push the changes to the GitHub repository,
$ git add .
$ git commit <message describing the changes done>
$ git push
Now that the edits are uploaded in the GitHub repository, it will be time to connect the GitHub repository to the ReadtheDocs website.
Importing the Project into ReadtheDocs
Navigate to the ReadtheDocs Website and sign in with the option Sign in with GitHub.
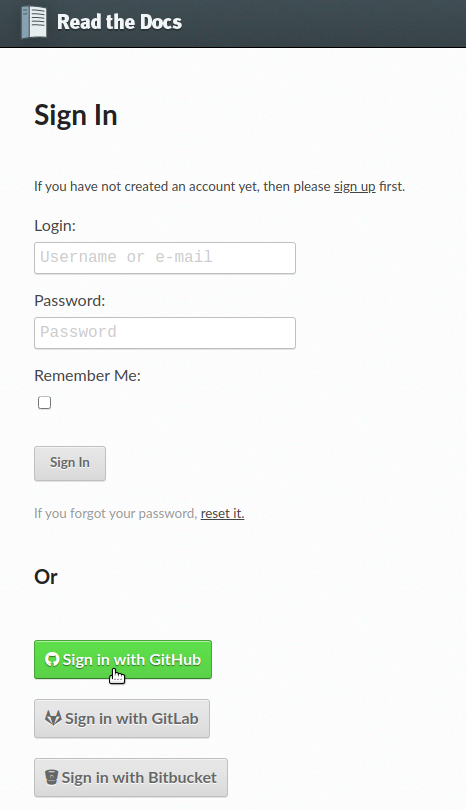
ReadtheDocs login with GitHub option. (click to expand)
Click on Import a Project.
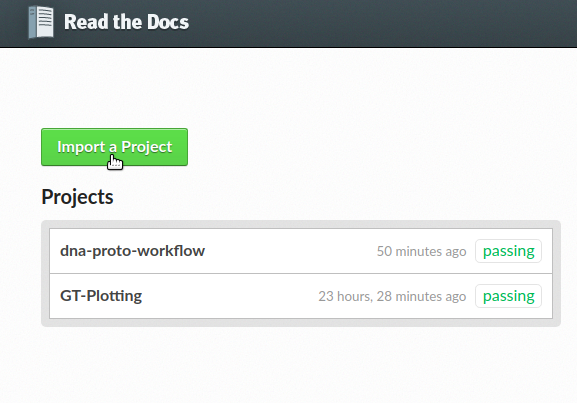
Import a project button. (click to expand)
Choose the project with the arrow symbol next to the repository that will be imported.
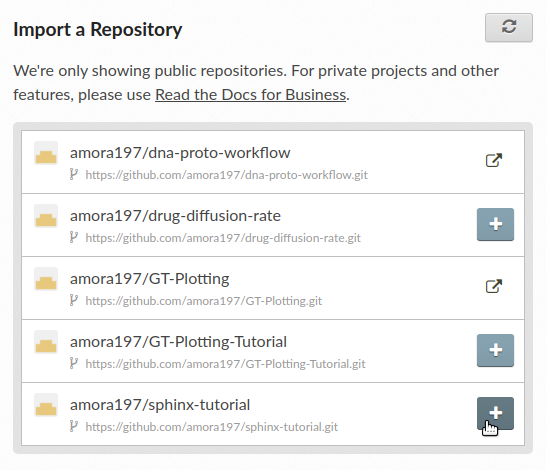
Choosing the project to import by clicking the arrow next to it. (click to expand)
Click Next, followed by clicking the Build version button.

Button to build the imported project. (click to expand)
Once the build has finished, click on the View Docs button where your ReadtheDocs webpage should be uploaded.
If the webpage opened without any errors, then CONGRATULATIONS! Otherwise, do resolve those issues to have a documentation webpage up and running. Any additional edits that are done on the Github repository will be reflected on this created ReadtheDocs webpage.
Attention
It may happen that building the project may be unsuccessful. Once any error is fixed, it is recommended to wait a few minutes before retrying to build the project; not waiting may cause the build to continue breaking.
Hopefully, this tutorial is useful and helpful to create right-away a documentation webpage for people to use.